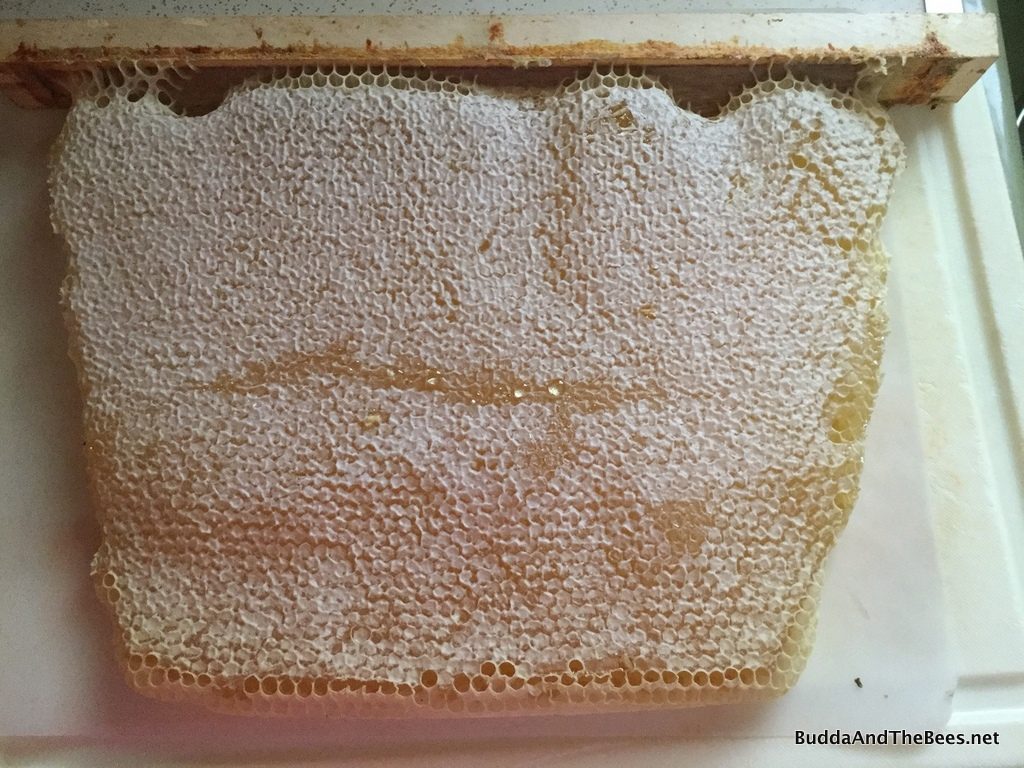
I took advantage of a change in the weather (30 degrees F cooler than yesterday) to harvest some of the honey out of BnB1. In past inspections, they had been making brand new white comb in the back and capping some delicious looking honey in it – perfect for taking and processing as cut comb instead of doing the usual crush and strain.
My plan was to take 3 bars from BnB1 and one bar from BnB3 that was held together with hair clips. But when I got into BnB1, there was so much capped honey, I couldn’t help myself and ended up taking 5 bars from BnB1 and left BnB3 for another day!
I took advantage of the cool weather to do a fuller inspection up into the brood nest, which I hadn’t done since early June, to make sure the queen was laying and that the colony was in good shape. I found lots of new larvae, so there will be another big hatch in a few weeks. Everything looked good and they still have 5 full bars of honey left in the back.
Of the 5 bars I took, 2 of them were good for comb honey, 1 good one got mangled when I put it into the nuc and it rubbed up against the comb next to it and the other 2 were on older comb, so they were destined for crush and strain.
Diana took some beautiful pictures of the first comb. She has quite the eye for capturing their essence.
This was my first time processing a lot of comb honey, so I learned a few things along the way. First, I found that the knife I was using got coated in honey and needed to wiped off with each cut. They sell special cutters to get consistent sizes and maybe I’ll look into that in the future. But you’d still have the same problem.
The second thing I learned (after the fact) was that you should let the combs drain before putting in the boxes. As you can see from the picture above, there is a lot of honey that drips out of the cuts and in my case, it ended up at the bottom of the box since I didn’t let that drain off. Next time.
The second comb had more texture to it than the first – probably a product of some of the cross combing that this colony seemed wont to do. It was still gorgeous. I put this in as a small image because when small, it looks to me like a human torso – pecs with nipples, abs and a belly button.
I ended up with 12 pieces and put them in some clamshell boxes that I bought recently. The clamshells work okay, but next time, I think I’ll buy the harder cased comb boxes like you see in stores. I posted this picture on Facebook and someone asked if I would sell it. So, maybe it’s time start making some money off this hobby!
I took the other 3 combs and the leftovers from the cut comb and crushed it all up. It’s really easy to crush up this new comb – there are very few hard bits like with older comb. It looks like I’ll have a least a gallon and a half – I’ll find out tomorrow when I bottle it1
Pan full of cut up comb for crushing
I still have friends that I like to give honey to, but maybe it’s time to start thinking about selling some of it and recouping some of my costs. After all, I’ve got at least 2 mores hive that I can harvest from!


4 Comments
tom · August 5, 2016 at 3:15 am
looking good don
Julie · August 6, 2016 at 3:02 pm
I’m salivating! Those are some beautiful combs. “Honey man” could be a model!
HB · August 18, 2016 at 7:34 pm
Such beautiful comb. Your bees did a great job this season. Here’s a thought for next season: I know some beekeepers use dental floss to cut comb honey but I like my cheese wire better.
Don · August 18, 2016 at 7:44 pm
Thanks, HB. I saw that Rusty Burlew over at Honey Bee Suite had a post about using dental floss, but cheese wire sounds like it would be easier/sturdier. For later combs, I found that using a really sharp knife that I clean off after each cut worked pretty well. (I scrape it off into the bucket where I put the odd sized pieces). And, I bought a new rack to drain the combs before boxing which is nice. Every attempt is a new learning experience – thanks for the tip!